Deploy to AWS S3 from GitLab CI/CD Pipeline

In this post, I will walk you through setting up your Amazon S3 bucket, setting up OpenID Connect (OIDC) in AWS, and deploying your application to your Amazon S3 bucket using a GitLab CI/CD pipeline.
The artifact we will be deploying to Amazon S3 is a jekyll website. However, this guide can be used to build a pipeline to deploy any artifact from GitLab to Amazon S3.
By the end of this post, you will have a CI/CD pipeline built in GitLab that automatically deploys to your Amazon S3 bucket. Let’s dive in.
Prerequisites
For this guide you should have the following:
- AWS account
- Gitlab account
- Basic knowledge of YAML scripting
Let’s say, you have setup Gitlab project/repository for source code management (SCM), you want to build you source code and push it to Amazon S3 for further deployment. This guide presents an ideal way to go about it.
Configure your Amazon S3 bucket
Amazon Simple Storage Service (Amazon S3) is an object storage service that offers industry-leading scalability, data availability, security, and performance. An object is a file and any metadata that describes the file. A bucket is a container for objects. To store your data in Amazon S3, you first create a bucket and specify a bucket name and AWS Region. Then, you upload your data to that bucket as objects in Amazon S3.
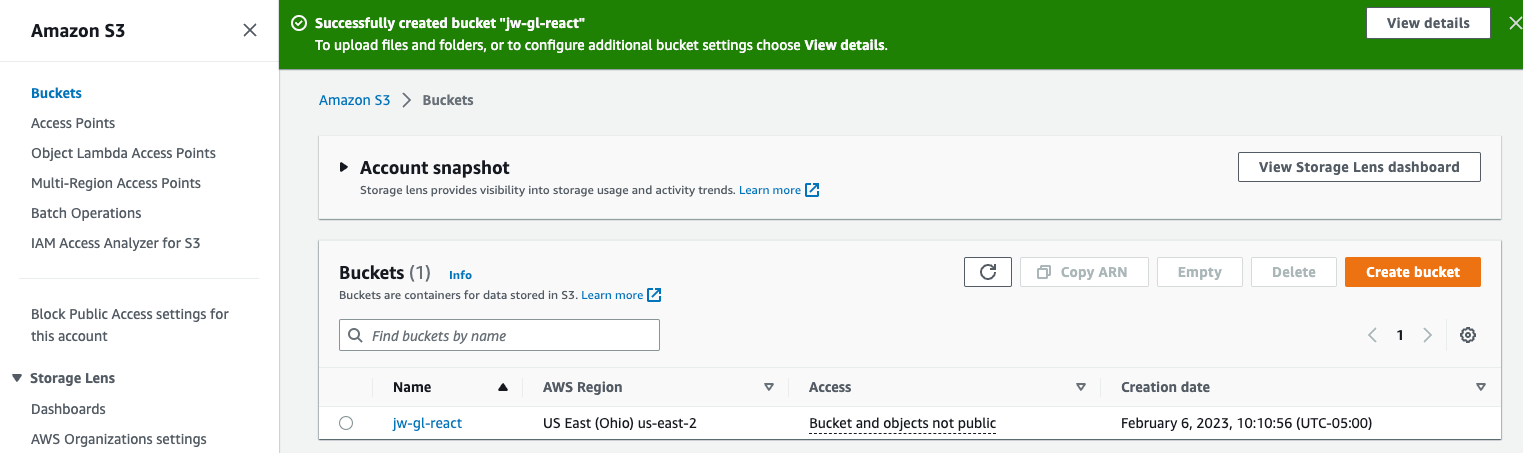
- Login to your AWS account, search for S3 using the search bar and select the S3 service.
- On S3 service home page, select Create bucket
- Enter a bucket name, select your region (you can leave the default region as us-east-1) and continue by clicking the Create bucket button at the bottom. I named mine
jw-gl-react.
After creating your bucket, you should be taken to a list of your buckets as shown below.
Set up OpenID Connect in AWS
OpenID Connect (OIDC) is an open standard for validating user’s identity (also known as authentication) built on the OAuth 2.0 protocol that a many Identity Providers (IdP) such as Facebook, Google, Salesforce and Gitlab support.
We use AWS OIDC identity provider to establish trust between an OIDC-compatible IdP (in our case Gitlab) and an AWS account. This is useful for creaiting custom sign-in code or managing your own user identities.
To deploy to your S3 Bucket from GitLab, we’re going to use a GitLab CI/CD job to receive temporary credentials from AWS without needing to store secrets. To do this, we’re going to configure OIDC for ID federation between GitLab and AWS.
- Open the IAM console inside of AWS.
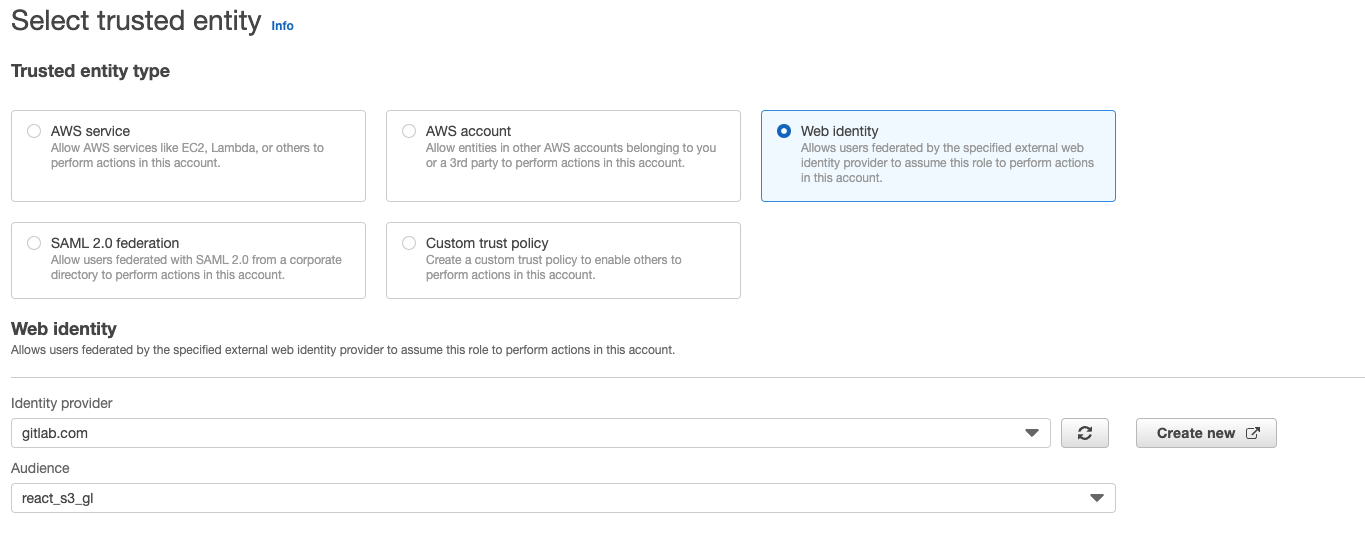
- On the left navigation pane, choose Identity providers, then choose Add provider. For provider type, select OpenID Connect
- For Provider URL, enter the address https://gitlab.com or https://gitlab.example.com for a self-hosted Gitlab instance.Then, choose Get thumbprint to verify the server certificate of your IdP.
- For Audience, enter a client ID that’s generic yet specific to your application. I used
react_s3_gl. To prevent confused deputy attacks, it’s best practice to use a name that’s hard to guess. Take a note of this value, you will use it to set theID_TOKENin your.gitlab-ci.ymlfile. - Verify the information that you have provided. When you are done choose Add provider
After you create the identity provider, you need to assign an IAM role to your identity provider to give it permissions to access AWS resources in your account. To do this we will first create a permission policy and then attach the policy to an IAM role.
-
On left navigation pane of the IAM console, select Policies and then Create policy.
-
Select the JSON tab and paste the following policy replacing
jw-gl-reacton the resource line with your bucket name.
{
  "Version": "2012-10-17",
  "Statement": [
    {
      "Effect": "Allow",
      "Action": ["s3:ListBucket"],
      "Resource": ["arn:aws:s3:::jw-gl-react"]
    },
    {
      "Effect": "Allow",
      "Action": [
        "s3:PutObject",
        "s3:GetObject",
        "s3:DeleteObject"
      ],
      "Resource": ["arn:aws:s3:::jw-gl-react/*"]
    }
  ]
}- Select the Next: Review button. Enter a name for your policy and finish up by creating the policy.
Now create the IAM role and attach the policy you just created.
- On left navigation pane of the IAM console, select Roles and then select Create role.
-
Under Trusted entity type, select Web identity. In the Web identity section, select the identity provider you created earlier. For the Audience, select the audience you created earlier. Select the Next button to continue.
Note: If you wanted to limit authorization to a specific group, project, branch, or tag, you could create a Custom trust policy instead of a Web identity. See GitLab documentation for a full list of supported filters.
-
Under the Add permissions section, search for the permission policy you just created above, tick the box and select Next to continue.
-
Give your role a name and click Create role
- Open the IAM role you just created. In the summary section, find the Amazon Resource Name (ARN) and save it.
Deploy to Amazon S3 bucket using a GitLab CI/CD pipeline
To mask our environment variables in the pipeline, we will use Github variables. Let’s create these variables
- Open your GitLab project. On the left navigation pane, click Settings and select CI/CD
-
Next to Variables, select Expand. Select Add Variables and create the following key value pair. Firstly,
ROLE_ARN, copy and paste the ARN of the IAM role you just created. Secondly,S3_BUCKET, copy and paste the S3 bucket name you created earlier. Lastly,AUDIENCE, copy and paste the AUDIENCE you created in AWS IAM OpenID provider.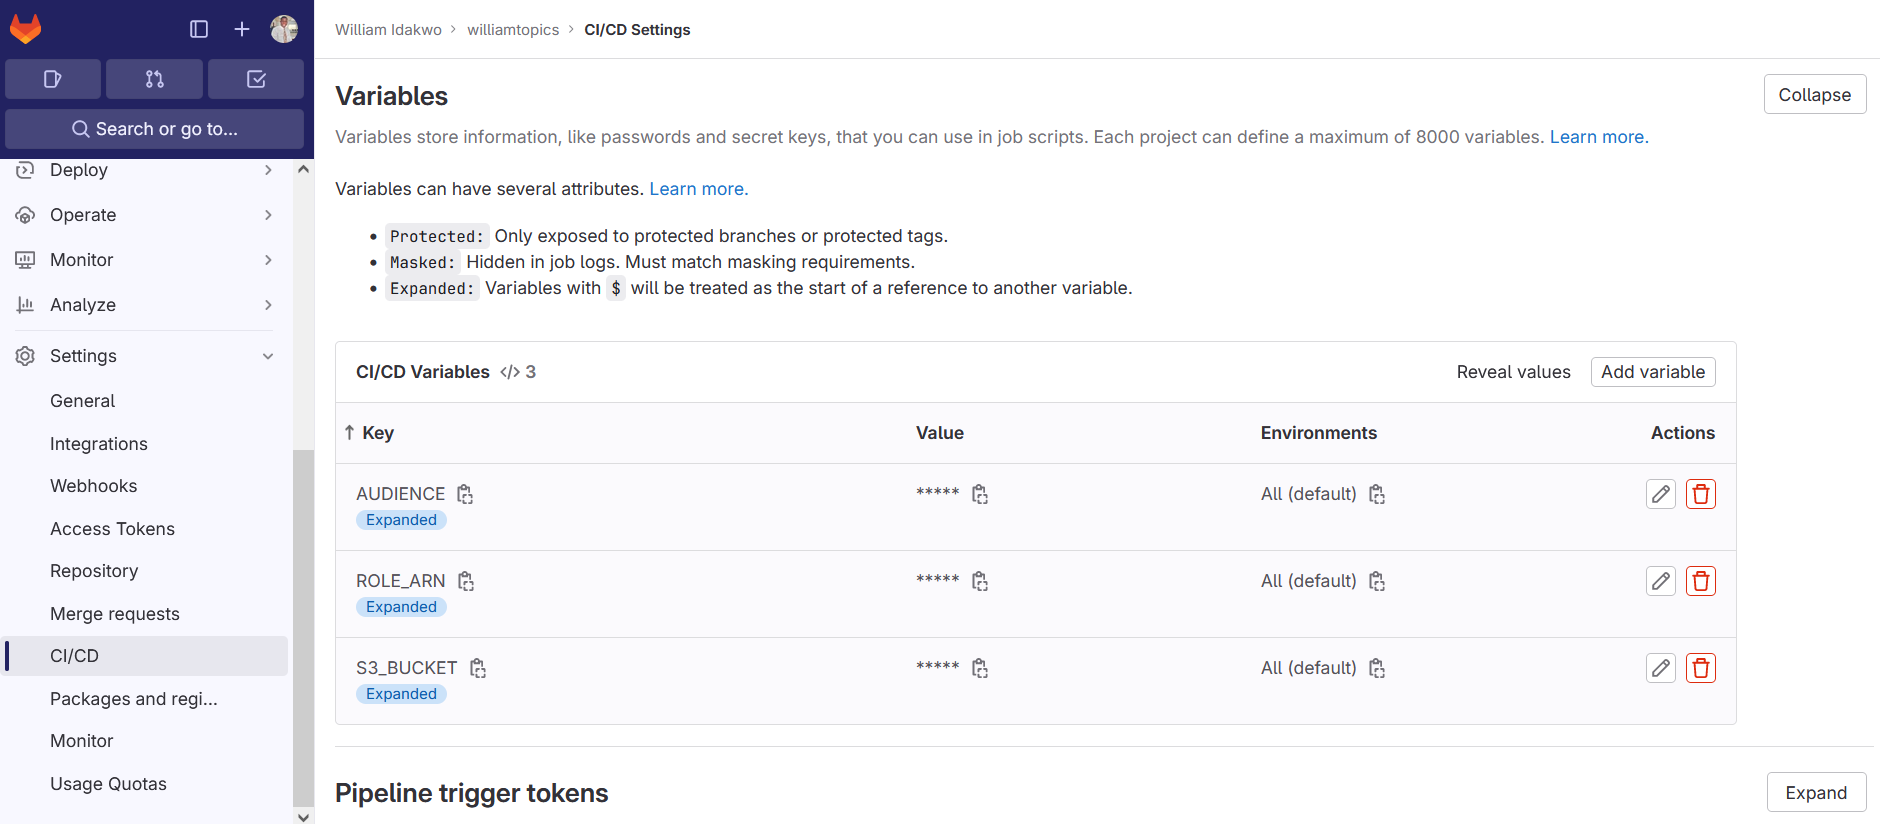
Next, create a gitlab-ci.yaml file in the root of your directory, it will contain our code as pipeline.
- Paste the following code inside your gitlab-ci.yaml file
stages:
  - build
  - deploy

.assume_role: &assume_role
    - >
      STS=($(aws sts assume-role-with-web-identity
      --role-arn ${ROLE_ARN}
      --role-session-name "GitLabRunner-${CI_PROJECT_ID}-${CI_PIPELINE_ID}"
      --web-identity-token $ID_TOKEN
      --duration-seconds 3600
      --query 'Credentials.[AccessKeyId,SecretAccessKey,SessionToken]'
      --output text))
    - export AWS_ACCESS_KEY_ID="${STS[0]}"
    - export AWS_SECRET_ACCESS_KEY="${STS[1]}"
    - export AWS_SESSION_TOKEN="${STS[2]}"

build artifact:
  stage: build
  image: ruby:latest
  before_script:
  - gem install bundler
  - bundle install
  #variables:
    #JEKYLL_ENV: production
    #LC_ALL: C.UTF-8
  script:
  - bundle exec jekyll build -d build
  artifacts:
    paths:
    - build/
    when: always
  rules:
    - if: '$CI_COMMIT_REF_NAME == "prod"'
      when: always

deploy s3:
  stage: deploy
  image:
    name: amazon/aws-cli:latest
    entrypoint:
      - '/usr/bin/env'
  id_tokens:
      ID_TOKEN:
        aud: ${AUDIENCE}
  script:
    - *assume_role
    - aws s3 sync build/ s3://$S3_BUCKET
  rules:
    - if: '$CI_COMMIT_REF_NAME == "prod"'
Let breakdown the code, the code starts with stages declaration, where we declare the pipeline stages build and deploy stages. Next, we use YAML anchors to define a reusable code block .assume_role: &assume_role. The code block retrieves temporary credentials from AWS IAM that we use subsequently in the deploy stage to push our build artifact to Amazon S3.
The build job runs in a ruby docker image and uploads the build directory as an artifact to be used during the next step.
Lastly, the deploy job runs in an aws-cli docker image. YAML anchors *assume_role runs the assume_role script, and then uses the aws-cli to upload your build artifact to the S3 bucket you defined as a variable. This job only runs if the change occurs on the prod branch.
You now have a CI/CD pipeline built in GitLab that receives temporary credentials from AWS using OIDC and automatically deploys to your Amazon S3 bucket.
DEPLOY!!!
References: Deploy a react app from GitLab to Amazon S3, Amazon S3, AWS Identity and Access Management